
Translate documents with Microsoft Word - this is how it works!
Translating documents with Microsoft Word - this is how it works!
Even if many people today speak and understand English, French or Spanish more or less well, most of them still have problems with technical terms, correct grammar and business language. If, for example, you receive a technical article in exactly this language, you often don’t understand a word of it. On the other hand, it can happen that you want to send a text you wrote in German to a business partner or pen pal in Sweden, China or Chioggia who doesn’t understand German. But thanks to Microsoft Office 365 Home, documents can be translated very quickly and converted into the target language. We reveal how this works here.
Translating documents: individual sections
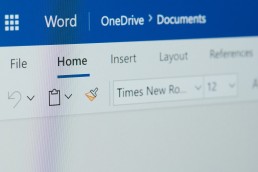
You understand most of it, but here and there some technical terms are missing? No problem! You can also easily translate a Microsoft Word document section by section. The following steps are necessary:
- First, the text section that is to be translated into the target language is marked with the left mouse button.
- Now click on the marked text with the right mouse button and select „Translate“ from the menu.
- In the window that then appears, the text is already translated into German.
- If you want to translate into another language, you can select the desired language from the drop-down menu in the „To“ field.
- If the original text is to be replaced in the new target language, select the relevant section and then click on „Insert“. The text section is converted into the new language.
- If you want to keep both language versions, simply move the cursor in the document to the place where the text should appear in the target language and then click on „Insert“.
- Of course, these steps also work in reverse, for example, if you want to translate documents from German to English.
Note: These steps can only be used to translate documents written in Word, Excel or PowerPoint. Outlook has its own translator, which must be installed as an add-in from the Office Store. It enables the translation of an e-mail message text without preparation. In this case, the translation is displayed directly next to the reading area in the inbox.

Translate entire Word document
Not only individual text passages, but also complete documents can be translated into countless languages with Microsoft Word.
- To do this, first click on the „Translate“ button in the „Check“ tab.
- Next, select „Translate document“.
- Both the source and target languages can now be selected in the window on the right.
- Then click on „Translate“ again, Word automatically creates a new file with the translated document.
Quick translation made easy
If you want a quick translation without Word, you can also use a helpful tool from Google. Here, however, translating documents is not always completely error-free.
- First, open the corresponding document in Google Docs.
- Then click on „Tools“ in the upper menu and select „Translate document“.
- The document must then be given a name and the language selected.
- Click on „Translate“.
- A version containing the translation will then open in a new window.
Attention: If Microsoft Office files are used, it can happen that „Translate document“ is not displayed. In this case, the file must first be converted.
What if I want to translate a text into Chinese or Cyrillic?
Documents can also be translated from non-Latin languages or letters. In this case, the menu „Input Tools“ is displayed in the toolbar. If you click on the down arrow next to it, you can select the corresponding language. Now the individual words or text passages can be entered and translated either in their phonetic spelling with Latin characters, via the virtual on-screen keyboard or even as handwritten characters. Tip: The „Input tools“ menu can also be called up quite simply using keyboard shortcuts: PC: Ctrl + Alt + Shift + K Mac: ⌘ + Option + Shift + K
Header image: © Cybrain, stock.adobe.com

Online Video Download - Videos from the net to your computer
Online Video Download - Videos from the net to your computer
It’s annoying when you’ve planned to watch a video later, when there’s time – and then it’s no longer available in the media library or streaming portal. „I wish I’d made a quick copy beforehand!“ is what some people think. But is such an online video download legal at all, or are you moving in a legal grey area? We explain!
What does the law say about online video downloads?
Depending on the method you use to export a video and thus create a private copy, you are actually moving in a legal grey area. Or not! According to Section 53 of the Copyright Act (UrhG), individual copies of videos from a media library, for example, may be made for private use on any medium. However, these copies may not be resold or lent out for money. However, it becomes problematic if access to the source of the video – i.e. the streaming service or the media library – was not entirely legal. For example, if you have not taken out a valid subscription. It also depends on HOW the private copy is made. If the screen content is saved with special software such as Web Video Recorder Professional or Web Video Recorder Premium while the film is running, everything is okay. However, you can also export a video directly from the graphics card – and then it gets complicated. The legal situation here is not entirely clear.
How do I get the online video download onto my PC?
There are various ways to start an online video download so that you can watch videos later and no longer miss the „rejects“ from the streaming services or media libraries. With screen capture software, for example, you can film the entire screen while the video is running. Afterwards, the video can be exported. To do this, select the recording window after installing and starting the programme. This then shows the section of the screen that is to be recorded. Then select video quality and storage location, and the recording can be started.

More convenient, however, are special programmes for video recording such as Web Video Recorder Professional or Web Video Recorder Premium. These programmes already include a browser so that popular video platforms such as YouTube, Yahoo or Stream can be accessed directly. After installation and start, all you have to do is click on the film and select „Download from this page“. The video is then automatically saved in the file manager and the online video download can start. Further advantages of this software:
- The videos can be exported to the computer, smartphone or tablet and watched at any time.
- Thanks to the extensive database in these programmes, a targeted search for specific topics on the supported video portals is also possible.
- The volume, size and speed of the recordings can be adjusted.
- The user interface can be changed individually.
- A download report is currently available.
- You can create your own folders in the media library.
- Automatic reminders so that no favourite programme is missed.
- Depending on the version, the downloaded files can be converted.
Be sure to read the small print when using streaming services!
We have already mentioned that you may find yourself in a legal grey area with an online video download. This becomes very clear when you take a look at the small print in the general terms and conditions of the contracts with Netflix, for example. It says: „You agree not to archive, reproduce (…) content and information available on Netflix or obtained from or through the Netflix service. You also agree not to circumvent, remove, alter, disable, degrade or prevent any copy protection on the Netflix Service“. Amazon and other streaming services have very similar clauses in their contracts, according to which you are therefore basically liable to prosecution if you record their content. Even if copyright law basically contradicts this – whether you want to take the risk of being blocked by the provider and not being able to watch anything at all is something everyone has to decide for themselves.
Header image: © Cybrain, stock.adobe.com

Cropping an image in Photoshop - how to do it!
Cropping an image in Photoshop - here's how!
You don’t have to be a professional graphic designer to crop an image. Even when compiling a digital image collection, great effects can be achieved with a „crop“ and an appropriate background. How to crop objects in photos is shown here.
Why you should crop an image
In the past, you simply took a few photos, chose the best ones and then stuck them in a photo album. Today, pictures have taken on a different meaning. For example, for social media profiles, job applications or just for fun. It is very practical to be able to „cut out“ individual elements from the overall picture – and that is what cropping a picture means when editing photos. It is especially important to be able to crop individual objects as a basis for photomontages. For example, it is possible to take a photo of your girlfriend at home in the living room and then crop her on the computer using the cropping tools Adobe Photoshop Elements 2021 or Adobe Photoshop Lightroom. With a few clicks, the sofa is gone, as is the coffee table next to it and the wall in the background. In the next step, the girlfriend can then be mounted, for example, in a hammock on the beach in Hawaii or on the summit of Mount Everest.

Image cropping: Edit photos like a pro
Adobe makes image cropping a breeze with its cropping tools. There are just four steps to edit photos with them:
1: Select motif
First, of course, open the image in Photoshop on the computer that is to be edited with the corresponding cropping tool. With a key click on „W“ or the quick selection tool in the menu bar, the object in the picture (for example the girlfriend) can now be selected. Simply move the mouse over it.
2: Set the edges of the object
When cropping objects, now click on the tab „Enhance edges“. In order to cut out the motif precisely, the parameters „Radius“, „Round off“ and „Reduce/Enlarge“ must be adjusted until the motif has been completely captured and the edges are where they should be.
3: Mount photos
Once the motif has been cropped exactly as you want it, simply copy it with the shortcut „Ctrl + C“. Now open a new picture with the desired background and paste the cropped object. Normally, unsightly, unsmoothed edges should still be visible now. Press the „E“ key to open the eraser function in Photoshop. Select the hardness „0“ and carefully erase the edges around the subject.
4: Edit the finest details when cropping the picture
Depending on how large the radius of the eraser is, retouching usually results in the loss of interesting details such as small hairs or a striking shadow. In this case, simply press the „B“ key, which opens the brush in Photoshop. First enlarge the areas of the photo that are to be corrected. Then, while holding down the „Alt“ key, move the cursor over the part of the picture you want to improve. Now press the left mouse button to copy the colour and structure of the selected part of the picture. With a few mouse wipes over the corresponding spot, hair or other details can now be faithfully reproduced where they should be.
This is what the "magic wand" is all about
The Magic Wand tool is selected with a left click from the toolbar. If it is clicked on a simple, preferably single-coloured background, this area is activated – recognisable by the dotted line. The motif to be cropped remains unaffected because it normally has a different colour and structure. With the key combination „Ctrl + X“ or the „Remove“ key, the marked area – the boring background – is simply cut out. However, a clipping made this way is much less clean than with the above method.
Header Image: © monticellllo, stock.adobe.com
Format your scientific paper in just a few steps
Format your scientific paper in just a few steps
In order to score points with a bachelor’s thesis, master’s thesis, diploma thesis or doctoral dissertation, very specific formatting is prescribed. Even the brightest minds sometimes despair of setting the correct page numbering or margins in Word. Aren’t there a few tricks in Microsoft Office 365 Home or Microsoft Word for formatting your academic work without risking a nervous breakdown? Yes, there are – and we’ll show you what they are.
Which areas do you need to format for a scientific paper?
Depending on the university, it is possible that there are very specific requirements as to how the formatting in Word should look. Therefore, it is helpful to find out exactly what the university’s requirements are before formatting the document for the academic paper. In general, however, you must always keep these points in mind when formatting a scientific paper:
- Font and font size
- Line spacing
- Page margins
- Page numbering
- Cover page
With formatting in Word, it’s basically quite easy – if you know how!
Formatting font and font size
If you want to format a scientific paper, you should make sure to choose a consistent, easy-to-read font. Usually, the sometimes somewhat old-fashioned serif font Times New Roman or the modern sans-serif Arial are used. For body text, the font should be used in 12 point, for headings 14 point.
Choose the correct line spacing
The texts are formatted as justified text, i.e. flush on the left and right so that nothing flutters at the edges. As a rule, the line spacing is 1.5; only for footnotes can a single line spacing be chosen. Remember the margins Especially in justified type, it is important that the margins – the space between the letters and the edge of the page – are large enough, because this makes reading easier. Before starting to write, the document should be set up so that the following margins are pre-formulated:
- top and bottom margins 2 to 2.5 cm each
- left margin 3 to 3.5 cm
- right margin 2 to 2.5 cm
Format academic paper and set page numbering
First things first: Neither the cover page nor the table of contents are given a page number (pagination). Depending on how the bachelor’s or doctoral thesis, etc. is structured, pagination will therefore only start from the third page or from the page on which the introduction is written. The page number is set in the formatting in the middle of the footer or right-justified. In order to start page numbering only from page 3 when formatting in Word, a few steps are necessary:
- a section break is inserted on page 2
- the footer must not be linked to the previous one
- now start with the command „Format page numbers“ from 1
How to make the cover page work
Pretty much every university requires a cover sheet for academic papers. It contains the most important key data and should give the examiners a quick overview of the formal aspects of the work. In a way, it’s like the cover of a book: it has to make a good first impression! The cover sheet must include the following information:
- Type of thesis (Bachelor’s thesis, Master’s thesis, doctoral thesis, etc.)
- the title and possibly a subtitle of the academic paper
- Name of the university, if possible also the logo in very good print quality
- The name of the author of the thesis and his/her matriculation number
- the author’s contact details
- the names of the persons who supervised the author during his or her work
- if available, the name of the second corrector
- Name of the degree programme or department
- Date of submission
Tip: How to structure a Bachelor's or Master's thesis
With these forms of academic work, the correct outline is crucial if you want to achieve a good grade. Usually, the outline looks like this:
- Cover page
- Abstract (preface/introduction)
- Table of contents
- List of images used (if available)
- List of tables used (if available)
- List of abbreviations
- Continuous text divided into
- Introduction
- theoretical framework
- Methodology
- Results
- Conclusion
- List of literature used
- Appendices, if any
- Affidavit
Header image: © monticellllo, stock.adobe.com

How to use the Google Authenticator on Windows
How to use the Google Authenticator on Windows
Google Authenticator is a fine thing. The app makes surfing the net much safer. Above all, it prevents unauthorised persons from accessing pages that are doubly secured with the so-called 2FA method. The problem is: the app is actually only available for iOS and Android devices. Double authentication via the PC is therefore not possible. Or is it? We show you how to set up the Microsoft Authenticator to be on the safe side from the computer as well.
This is two-factor authentication
More and more online service providers are requiring users to identify themselves in addition to their password in order to log in to their account Authentication is usually done by entering a password. But instead of being able to access the site, the user must first identify himself with another code, which he can retrieve on his installed Google Authenticator, for example, and which is only valid for a few minutes.
Google Authenticator or Microsoft Authenticator?
Although Google Authenticator works equally well for iOS and Android, Microsoft Authenticator is the better choice for some. Especially if Microsoft Office, Microsoft Office 365 Pro Plus, Windows 10 or Windows 10 Pro are to be equipped with this security tool
Google Authenticator
It is one of the most popular authentication apps. Many iOs and Android users are particularly fond of its ease of use. To add a new account to the app, simply photograph the QR code. This also works while the app is still open. Disadvantages: Unfortunately, the software cannot be locked (for example, via a PIN or fingerprint). So if someone manages to unlock the smartphone, they have access to all the codes stored in the app. Synchronising the 2FA codes between two devices does not work either. With a new smartphone, all accounts must therefore be added again
Microsoft Authenticator App
The Microsoft Authenticator app, which is also free of charge, also works on iOS and Android. However, it has the advantage that it can be easily integrated into other Microsoft accounts. Several devices can be set up with the Microsoft Authenticator app. The authentication codes are encrypted and synchronised via the cloud Another plus: All added accounts are automatically backed up, so that switching to a new device goes smoothly. So anyone who works daily with Windows 10 every day will have an easier time with the Microsoft Authenticator.

How to use Google Authenticator on Windows too
With the Microsoft programs Microsoft Office, Microsoft Office 365 Pro Plus, Windows 10 or Windows 10 Pro the Google Authenticator can be used if you don’t want to activate your mobile phone or set up the Microsoft Authenticator every time for two-factor authentication The prerequisite for this, however, is that you have the secret key that the respective online provider provides during the initial setup. Attention:The Google Authenticator is not offered as a separate tool for Windows! In order to use the security tool, the algorithm with which the security codes are created must first be found. The open-source app WinAuth knows this algorithm and generates the same codes as on a smartphone after entering the secret key. This is how you proceed if you want to set up Google Authenticator or Microsoft Authenticator for Microsoft Office, Microsoft Office 365 Pro Plus, Windows 10 or Windows 10 Pro:
- Download the latest version of WinAuth.
- Unzip and launch, then click „add“ to add a new provider.
- Select Google as the first provider to find the algorithm.
- Enter the name of the provider and select the icon.
- Then enter the secret key in the middle field.
- Under „Verify Authenticator“ a code appears to log in to the corresponding provider.
- click „OK“ and set up further providers
- A new 2FA code is generated simply by clicking the update code next to the provider name.
Header image: © Proxima Studio, stock.adobe.com

Windows 10: So funktioniert die Power Shell
Windows 10: So funktioniert die Power Shell
Eigentlich ist die Power Shell bei Windows 10 oder Windows 10 Pro ein dermaßen geniales Tool, dass es jeder nutzen sollte. Aber viele User, die das Microsoft Office kaufen, denken, das sei nur etwas für Profis. Weit gefehlt! Denn mit der Power Shell lassen sich jede Menge Aufgaben am Rechner mit wenigen Eingaben erledigen. Anstatt endlos viele Klicks durch Untermenüs und Systemeinstellungen zu machen, reicht die Power Shell. Wie man genau damit arbeitet und welche Vorteile dieses Werkzeug bringt, erklären wir hier.
Das ist die Power Shell bei Windows 10
Unter Windows 10 und Windows 10 Pro lassen sich die Befehle für den Computer auf zweierlei Arten eingeben: Einmal mit der klassischen Eingabeaufforderung oder cmd.exe. Und zum zweiten mit dem Programm Power Shell.
Damit lassen sich auf kurzem Weg Befehle ausführen, die – falls in Windows 10 überhaupt möglich – per Mausklick und den Einstellungen äußerst kompliziert sind.
Das heißt, dass die Eingabeaufforderung mit PowerShell wesentlich erleichtert wird, weniger zeitraubend ist und das Arbeiten am Computer effektiver gestaltet.
Im Kern ist PowerShell eine aktuelle Version der gewohnten Eingabeaufforderung. Sämtliche „alten“ Befehle funktionieren auf die eine wie auf die andere Art, jedoch kommen bei der Power Shell einige neue Funktionen hinzu, die den Anwendern der alten Eingabeaufforderung verwehrt bleiben. Als Beispiel seien hier nur If-Befehle genannt.
Nach dem Microsoft Office kaufen ist die Arbeit mit PowerShell unter anderem daran zu erkennen, dass die Darstellung einen blauen Hintergrund mit weißer Schrift verwendet.
Tipp: Gibt man in der Power Shell den Befehl „cmd“ beziehungsweise „cmd.exe“ ein, lassen sich die Befehle wie in der gewohnten Eingabeaufforderung eingeben.
Power Shell per Eingabeaufforderung starten
Damit man die Power Shell unter Windows 10 Befehle ausführen kann, muss sie natürlich erst einmal gestartet werden.
Nach der Eingabeaufforderung (Tastenkombination) „WINDOWS + R“ wird dazu der Befehl „PowerShell“ eingetippt. Alternativ kann die PowerShell auch über das Startmenü aufgerufen werden.
Power Shell als Administrator ausführen
Das Startmenü erlaubt es auch, das Programm als Administrator zu starten und Befehle ausführen zu lassen. Der Vorteil ist, dass damit mehr Befehle als mit der einfachen Eingabeaufforderung ausgeführt werden können.
- Hierzu im Startmenü „PowerShell“ eintippen, dann auf den entsprechenden Eintrag klicken.
- Mit der rechten Maustaste PowerShell anklicken, „Als Administrator ausführen“ wählen.
Jetzt können sämtliche Funktionen der PowerShell-Eingabekonsole verwendet werden.

Diese Vorteile hat die Power Shell bei Windows 10
Einer der größten Vorteile ist, dass Befehle nicht mehr mühsam über die Eingabeaufforderung oder cmd.exe eingegeben werden müssen, sondern direkt in ein Eingabefenster geschrieben werden können.
Außerdem lassen sich nützliche Funktionen mit einem einfachen Befehl abrufen. Dazu gehören zum Beispiel die Analyse der Prozessor-Auslastung, die Wiederherstellung eines defekten Start-Buttons, das Auslesen der Windows Seriennummer oder auch das Deinstallieren von Apps.
Die nützlichsten Funktionen und Befehle hierbei sind:
- get-command + Enter: Dieser Grundbefehl zeigt eine Übersicht sämtlicher Befehle.
- Taste F7: Bei älteren Windows 10 Versionen werden damit die letzten eingegebenen Zeilen dargestellt.
- clear + Enter: Die aktuelle Kommandozeile wird angezeigt, während die letzten eingegebenen Zeilen ausgeblendet werden.
- && + Enter: Die Kombination dient dazu, mehrere Befehle gleichzeitig einzugeben. Diese werden mit dem doppelten Und-Zeichen (ohne Leerzeichen) voneinander getrennt.
- Charmap + Enter: Hierdurch wird die Windows Zeichentabelle angezeigt, die Sonderzeichen auflistet, die nicht direkt auf der Tastatur vorhanden sind.
- dir (Dateiname) + Enter: Mit diesem Befehl lässt sich auch dann nach Dateien im System suchen, wenn man den vollständigen Namen der Datei nicht kennt. Anstelle der unbekannten Buchstaben kann einfach das Stern-Symbol * getippt werden, Power Shell sucht dann selbstständig nach Dateien, die mit dem unvollständigen Dateinamen übereinstimmen.
- dir /?: Ein Kurzbefehl, der die Details zu den dir-Funktionen erläutert.
PowerShell bietet zudem die Möglichkeit, Dateipfade direkt im Programm zu öffnen. Das heißt, dass der Pfad aus der Kopfzeile im Explorer in PowerShell gezogen wird und weitere getippte Eingaben entfallen.
Header Bild: © Mirsad, stock.adobe.com
Start menu Windows 10: How to activate it in Windows 11 as well
Start menu Windows 10: How to activate it in Windows 11 as well
Instead of establishing Windows 10X as the successor to the popular Windows 10 Pro windows 10X, Microsoft has come up with something completely new: Windows 11 with new features and, most importantly, a completely revamped design. But it is precisely this that is already meeting with little approval from some users. Those who are used to the Windows 10 start menu will find it difficult to switch to the Windows 10 successor. But with a few tricks, you can work as usual with the Windows 11 beta version.
This is different from Windows 10 Pro
As early as the end of June 2021, users were able to download the test builds of Windows 11 via the Windows Insider Programme (the final version should be available at the end of 2021). And anyone who has tried out Windows 11 Beta will quickly realise that many an element has been taken over from Windows 10X Particularly striking is the start of the Operating system. Unlike the Windows 10 start menu, it floats slightly above the taskbar in the 11 version and can also be placed in the middle of the desktop Gone are the live tiles, which had caused some annoyance. In their place, you will now find the pinned programmes in the upper area of the screen, and the most recently used ones just below them. The controls are also placed there – and everything has elegant rounded corners. Microsoft has retained the light and dark modes in the latest version – but without the conspicuous Windows logo. Another innovation is actually old hat – but a popular one! Because with Windows 11, the widgets return. The small snippets of information with the latest news, weather forecast or share prices are still familiar to users from Windows Vista Tip: Computers running the current Windows 10 version can be updated to Windows 11 free of charge. The prerequisite for this, however, is that the hardware is suitably fit.

Requirements
- Dual-core CPU (1GHz) with 64-bit support
- 4 GByte RAM
- 64 GByte of memory
- UEFI firmware
- Secure Boot with TPM 2.0
- DirectX 12 compatible graphics card
- Display with at least 720p resolution
If you prefer to return to the Windows 10 start menu: Here are the steps to do so
Microsoft obviously shows understanding for the habits of its loyal fans. That’s why Windows 11 includes an option that allows users to return to their beloved Windows 10 start menu in a flash. However, the programmers have hidden this option a little. But searching is supposed to be fun, as they say.
These are the steps to return to the Windows 10 start menu:
- First, right-click on an empty space on the Taskbar click.
- Then "Taskbar settings activate.
- If not set automatically, now in the left-hand bar "Personalisation in the left-hand bar.
- Now in the window "Taskbar behaviours or "Taskbar behaviours".
- Select the word " left " with the function " Taskbar alignment". This puts the start button, fold-out start menu and other icons back in the usual place.

If you like them, you can also bring back the tiles
Windows 10 Pro has caused tremendous displeasure among some users. The cause of the anger was the tiles that housed the apps in the Windows 10 Start menu Some, however, found this to be more elegant and clear than the old design. Windows 11 does without the „tiling“. However, those who love them can also activate the design with a few steps and a few clicks:
- Open the registry editor with the search term "regedit".
- In the navigation bar, enter the command "ComputerHKEY_CURRENT_USERSoftwareMicrosoftWindowsCurrentVersionExplorerAdvanced".
- Now select "Advanced" in the sidebar with a right mouse click
- A context menu appears in which "New - DWORD value (32-bit)" is selected.
- This new DWORD value is named "Start_ShowClassicMode".
- Double-click to open this new value, now enter a 1 under the password "Value" and save with "OK".
- To return to the tile start menu, you now only have to restart the computer
Header Image: © monticellllo, stock.adobe.com
PowerPoint presentation: How to create a timeline
PowerPoint presentation: How to create a timeline
For years, a good PowerPoint presentation has made the explaining world at schools and universities, in evening classes and at business meetings easier, more colourful, more beautiful. What some don’t know: With Microsoft PowerPoint is also an excellent way to create a timeline that visualises, for example, a chronological sequence of events in such a way that it „sticks“. Here we show how to integrate the timeline into a PowerPoint design and even make it more concise with effects.
Does a timeline make PowerPoint more vivid? YES!
Although it is somewhat tricky to use, for instance Microsoft PowerPoint 2016 to insert a descriptive timeline into the PowerPoint design – but the PowerPoint presentation wins! It turns simple PowerPoint templates into a PowerPoint presentation that concisely shows what happened when and in what order. From birth to school enrolment to wedding and all the way to an adventure trip in South America. Of course, the timeline in a PowerPoint presentation is also invaluable in business. For example, if you want to clearly show when a certain business branch started, when the first highlight took place and when the sales figures went up Here we show step by step how the timeline enhances PowerPoint.

1: Set a timeline with Microsoft PowerPoint
- With the drawing function "Line" from the corresponding box in the menu bar, you first define the timeline. Created with the Shift key held down, the line remains exactly horizontal
- In the menu "Draw" menu you can still design the axis. For example, as a coloured line, dotted or in a stronger image.
- If you click on the line with the right mouse button, you can use the function "Set as standard line function. This will format all other lines in the PowerPoint template accordingly.
- At the beginning of the timeline, you now set a much shorter vertical start line as well as a first marker line - again by holding down the Shift key.
2: No timeline without a peak
- Again from the box in the menu bar, first select the block arrow. Click on it with the right mouse button, then "Edit points select.
- Right-click on the lower left point of the block arrow and select "Open path" "Open path select. Delete the two points at the bottom left and the one at the top left. What remains is a simple triangle
- The same formatting as the time axis is obtained by activating the time axis with a click. Then with the key combination "Control + Shift + C" copy.
- Next, click on the triangle and select the key combination " Control + Shift + V". This makes the filling of the shape disappear, the remaining lines are formatted in the same way as the timeline and the marking lines.
3: Place the timeline in the PowerPoint design
- All the previous strokes including the tip are now roughly positioned at the right place in the PowerPoint presentation
- To fine-tune the elements in the "Start" tab "Arrange - Align - Centre vertically" select.
- Now mark the start line and the time axis and "Arrange - Align - Left-aligned" select.
- For the correct positioning of the tip, select "Arrange - Align - Right-aligned" .
4: The events on the timeline of the PowerPoint presentation
- Now, of course, the "highlights" should also be visible on the timeline of the PowerPoint presentation according to their occurrence
- To do this, first create two text boxes. The first one marks the time of the event, the second one is needed for the actual text.
- The text box for the time is now positioned roughly above the first marking line, the second below it.
- Now mark both text boxes as well as the vertical line "Arrange - Align - Centre horizontally" select.
- In the next step, group the three elements with "Arrange - Group" so that all elements can be copied at the same time or moved by drag and drop.
- With the commands "Control + C" or "Control + V all elements can now be copied and pasted in any number at the desired position
- Before you fill the individual event boxes with text, select all elements and choose "Arrange - Align - Distribute Horizontally" so that all events are displayed at the same distance from each other.
Header Image: © Aleksei, stock.adobe.com

Unprotect Excel sheets: This is how it works
Unprotect Excel sheets: This is how it works
It makes your hair stand on end: There you are, having painstakingly created a perfect spreadsheet in Excel at last. You send it to the team members or the boss – and they change a value here, move a cell there or even delete the important table completely. All the work was for nothing … To prevent this, individual or even all cells of such a worksheet can be locked and the entire sheet can be secured with a password. But what if you still have to work on it later? Then it makes sense to be able to unlock the Excel sheet. Here we show step by step how this works.
Unprotect Excel sheets with a few clicks
Actually, you can only unprotect Excel sheets if you know the corresponding password (exceptions to this below). If the sheet is protected with a password, it cannot be edited for the time being. In order to make this possible, five steps are sufficient to unprotect Excel sheets: 1. First open the protected file. 2. Then jump to the cash register „Check“ at the top. 3. Find the category „Changes“ and press the button „Unprotect sheets“. 4. Now the password must be entered in the corresponding prompt field. 5. Confirm with „OK“. To protect an Excel sheet with Microsoft Excel again, a new password is created via the button „Protect sheet“.
Microsoft Excel keeps a loophole open
Too bad if you have secured an Excel spreadsheet with a password as a precaution – and then forget exactly that! Do you then have to do all the work all over again and create a new Excel spreadsheet? No! Fortunately, with Microsoft Excel and an additional tool, you can remove the Excel sheet protection without using the password.
How to remove the Excel password
If you want to remove the Excel sheet protection without knowing the password, you first have to download the programme 7-Zip for free and install it on your PC. Once all this has been done, proceed as follows:
- Open the folder with the corresponding Excel file.
- Right-click on the file and open it with the command "7-Zip > Open".
- A folder with the name "xl" is shown, which must be opened.
- Select the term "worksheets" in this folder.
- Copy the file "sheet1.xml" that appears to the desktop.
- open "sheet1.xml" in a word processing programme, leaving the 7-Zip programme open.
- In Excel 2010, search for the term "password" using the "Search" command (key combination "Ctrl + F") (in Excel 2013 and Excel 2016, enter "sheetProtection" as the search term).
- In the Excel 2010 file, the entry with the password is now displayed in inverted commas.
- Delete the password (not the inverted commas!).
- The display must now show password="". (As of Excel 2013, the display must look like this "<sheetProtection>").
- Save the file "sheet1.xml".
- Next, copy the file m 7-Zip archive to the same place where it was before.
- Mark the pop-up option field with "Yes" and close the 7-Zip programme.
- Now open the file with Microsoft Excel.
- Now, as described above, the Excel sheet protection can be removed with a few clicks.
Does this work with the whole Excel file?
That would be too good – especially for people who would have unauthorised access to protected files. That’s why the steps only work if individual Excel sheets are protected with a password.
Help - the button "Unprotect sheets" cannot be activated!
If the button „Unprotect sheets“ is greyed out and cannot be clicked, the document probably has a release protection. In order to be able to edit the document, this must first be removed.
- First click on Check > Unprotect.
- Then release the Excel spreadsheet with Check > Release Workbook.
- In the window that now appears, click on "Allow multiple users to edit at the same time". This also enables you to merge workbooks.
- In the next window, simply confirm with "Yes".
Unprotect Excel sheets: This is how it works
Unprotect Excel sheets: This is how it works
It makes your hair stand on end: There you are, having painstakingly created a perfect spreadsheet in Excel at last. You send it to the team members or the boss – and they change a value here, move a cell there or even delete the important table completely. All the work was for nothing … To prevent this, individual or even all cells of such a worksheet can be locked and the entire sheet can be secured with a password. But what if you still have to work on it later? Then it makes sense to be able to unlock the Excel sheet. Here we show step by step how this works.
Unprotect Excel sheets with a few clicks
Actually, you can only unprotect Excel sheets if you know the corresponding password (exceptions to this below). If the sheet is protected with a password, it cannot be edited for the time being. In order to make this possible, five steps are sufficient to unprotect Excel sheets: 1. First open the protected file. 2. Then jump to the cash register „Check“ at the top. 3. Find the category „Changes“ and press the button „Unprotect sheets“. 4. Now the password must be entered in the corresponding prompt field. 5. Confirm with „OK“. To protect an Excel sheet with Microsoft Excel again, a new password is created via the button „Protect sheet“.
Microsoft Excel keeps a loophole open
Too bad if you have secured an Excel spreadsheet with a password as a precaution – and then forget exactly that! Do you then have to do all the work all over again and create a new Excel spreadsheet? No! Fortunately, with Microsoft Excel and an additional tool, you can remove the Excel sheet protection without using the password.
How to remove the Excel password
If you want to remove the Excel sheet protection without knowing the password, you first have to download the programme 7-Zip for free and install it on your PC. Once all this has been done, proceed as follows:
- Open the folder with the corresponding Excel file.
- Right-click on the file and open it with the command "7-Zip > Open".
- A folder with the name "xl" is shown, which must be opened.
- Select the term "worksheets" in this folder.
- Copy the file "sheet1.xml" that appears to the desktop.
- open "sheet1.xml" in a word processing programme, leaving the 7-Zip programme open.
- In Excel 2010, search for the term "password" using the "Search" command (key combination "Ctrl + F") (in Excel 2013 and Excel 2016, enter "sheetProtection" as the search term).
- In the Excel 2010 file, the entry with the password is now displayed in inverted commas.
- Delete the password (not the inverted commas!).
- The display must now show password="". (As of Excel 2013, the display must look like this "<sheetProtection>").
- Save the file "sheet1.xml".
- Next, copy the file m 7-Zip archive to the same place where it was before.
- Mark the pop-up option field with "Yes" and close the 7-Zip programme.
- Now open the file with Microsoft Excel.
- Now, as described above, the Excel sheet protection can be removed with a few clicks.
Does this work with the whole Excel file?
That would be too good – especially for people who would have unauthorised access to protected files. That’s why the steps only work if individual Excel sheets are protected with a password.
Help - the button "Unprotect sheets" cannot be activated!
If the button „Unprotect sheets“ is greyed out and cannot be clicked, the document probably has a release protection. In order to be able to edit the document, this must first be removed.
- First click on Check > Unprotect.
- Then release the Excel spreadsheet with Check > Release Workbook.
- In the window that now appears, click on "Allow multiple users to edit at the same time". This also enables you to merge workbooks.
- In the next window, simply confirm with "Yes".