Removing Office 365 (trial or older Office versions) registry remnants
Remove Office 365 (trial or older Office versions) registry remnants
-
Download RemoveTool – Download here → RemoveTool
-
Run or open RemoveTool
-
After running the tool, click on„extended“ in the bottom left-hand corner of the window and uncheck the„Repair“ checkbox
-
Then follow the instructions step by step. If an error is found, click on„Fix problem„
-
Then restart the PC
Header image: © dennizn, stock.adobe.com
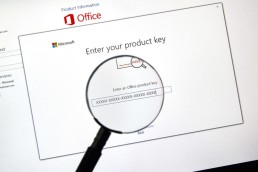
How to read out product keys and licences under Windows
How to read product keys and licences under Windows
It is not easy to get the product key of Office. Especially if you want to do without third-party programmes and you have to face the fact that you can’t achieve anything via command prompt (cmd). Instead, we have to use the new PowerShell. For the readout process, the normal editor must first be opened. You can easily find it using the Windows search function. Copy the following source code into the editor window:
[code lang="php"]
function Get - MSOfficeProductKey
{
    param([string[]]$computerName = ".") $product = @() $hklm = 2147483650$path = "SOFTWAREMicrosoftOffice "foreach ($computerin $computerName)
    {
        $wmi = [WMIClass]"\$computerrootdefault:stdRegProv"$subkeys1 = $wmi . EnumKey($hklm, $path) foreach ($subkey1in $subkeys1 . snames)
        {
            $subkeys2 = $wmi . EnumKey($hklm, "$path$subkey1") foreach ($subkey2in $subkeys2 . snames)
            {
                $subkeys3 = $wmi . EnumKey($hklm, "$path$subkey1$subkey2") foreach ($subkey3in $subkeys3 . snames)
                {
                    $subkeys4 = $wmi . EnumValues($hklm, "$path$subkey1$subkey2$subkey3") foreach ($subkey4in $subkeys4 . snames)
                    {
                        if ($subkey4 - eq "digitalproductid")
                        {
                            $temp = "" | selectComputerName, ProductName, ProductKey $temp . ComputerName = $computer$productName = $wmi . GetStringValue($hklm, "$path$subkey1$subkey2$subkey3", "productname") $temp . ProductName = $productName . sValue $data = $wmi . GetBinaryValue($hklm, "$path$subkey1$subkey2$subkey3", "digitalproductid") $valueData = ($data . uValue) [52..66]
                            # decrypt base24 encoded binary data
                            $productKey = ""$chars = "BCDFGHJKMPQRTVWXY2346789 "for ($i = 24;$i - ge0;$i--)
                            {
                                $r = 0for ($j = 14;$j - ge0;$j--)
                                {
                                    $r = ($r * 256) - bxor $valueData[$j]$valueData[$j] = [math]::Truncate($r / 24) $r = $r % 24
                                }
                                $productKey = $chars[$r] + $productKeyif (($i % 5) - eq0 - and $i - ne0)
                                {
                                    $productKey = "-" + $productKey
                                }
                            }
                            $temp . ProductKey = $productKey$product += $temp
                        }
                    }
                }
            }
        }
    }
    $product
}
[/code]
Now you have to save the file as office.ps1 on the desktop. Small tip: Put the file name in inverted commas in the save dialogue, i.e. „office.ps1“. This way no unwanted .txt will be appended. Next you need the bit version of your Office. If you don’t know it, open Word, for example, click on File in the top left-hand corner, then on Account and then on Info about Word (for Office 2013). This path may differ depending on the Office version. In the upper part of the window that appears, you should be able to see whether it is a 32-bit or 64-bit Office. Then search for powershell using the Windows search function. For a 64-bit Office, right-click on the Windows PowerShell entry and select Run as administrator. For a 32-bit office, select the Windows PowerShell (x86) entry and start it as administrator. Now enter the following command in the blue window that appears: Set-ExecutionPolicy RemoteSigned Then call the saved script with the following command. Note that you have to use your own user name (e.g. Lisa) instead of %User% (e.g. C:UsersLisaDesktop…). Import-Module C:Users%User%Desktopoffice.ps1; Get-MSOfficeProductKey Congratulations! The product key should now be displayed.
Header image: © dennizn, stock.adobe.com
Removing programmes from the Autostart (Windows 7)
Removing programmes from the Autostart (Windows 7)
Finding the Autostart in Windows 7
There are several ways to affect the autostart. However, in this tutorial we have only chosen one of these options, as it also works under other Windows installations. In addition, no external programmes are necessary.
-
- In a first step,open the Start menu
by clicking on the Windows button in your taskbar.
-
- In the input field Search programmes/files, look for the application Run and open the command line with a mouse click.
Note: Alternatively, you can also use the key combination Windows key + R
- In the input field Search programmes/files, look for the application Run and open the command line with a mouse click.
to call up the command line under Windows 7.
-
- Type the command msconfig
into the input field via the keyboard. This opens the system configuration of your operating system. Here you will find the autostart services.
- In the tab menu, switch to the item System start
. Voilà: The services now displayed are loaded in the background at every start.

Remove programmes from the Autostart
Now we can start to clean out the Autostart a bit and deactivate all services, applications and programmes that are not needed at all during system start-up. Most of the time, there are many, many of them.
Note: Make sure, however, that you only deactivate services in the Autostart that you really do not need.
However, all changes can be easily undone if necessary. In this case, however, remember what you have deactivated.
-
- To prevent a programme from being included again the next time you start the system, you can easily deactivate it via the small box in the System Start-up Element
area. Simply remove the tick in front of the respective programme.
- When you have deselected all applications whose start should be prevented, you must confirm your intervention by clicking on Apply. You can then close the System Configuration window by clicking on OK.
- Windows 7 will now inform you that all changes will only be carried out after a restart
. Carry this out and enjoy the faster system start.

Putting applications in the autostart
Now, however, it may happen that we want to put an application itself into the autostart under Windows 7, which cannot be selected or deselected simply by ticking it. In other words, a programme that does not appear at all in the previous list.
-
- To add such a programme to the Autostart, click once on the Start button in the taskbar and select the entry All Programs
.
-
- There, among the numerous files and folders, you will also find one called Autostart
. By default, this is empty under Windows 7.
-
- Right-click on this folder and select the Open
button in the context menu that opens. A new window opens.
- You can now copy application shortcuts
into this window, which will then be executed in the background during a repeated system start. If you remove these shortcuts again, they also disappear from the autostart.

Note: Be careful to only put shortcuts in the named folder
and not the .exe of a programme, otherwise it „can’t find“ its own path. We have summarised how to create such a shortcut for you in the article Windows 7: Creating a Shortcut.
Which programmes should be deactivated in the Autostart?
Unfortunately, it is not possible to give a blanket answer to this. However, most applications that are automatically started at system start-up are not necessary.
In any case, we would recommend that you leave your computer’s antivirus programme in the autostart and also not prevent all applications that are related to the sound or graphics card from starting. However, this is not generally valid.