
Microsoft Word: Insert page numbers - easy from page 3 onwards
Microsoft Word: Inserting page numbers - simply starting on page 3
Inserting page numbers in Microsoft Word
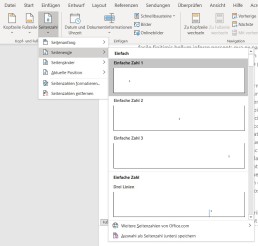
To insert page numbers in Microsoft Word, go to the „Insert“ tab and find a drop-down menu „Footer“ in the „Header and Footer “ section Here you can select a footer according to your taste
As soon as you have selected a format for the footer, Word automatically switches to the header or footer view.
In this tab „Header and Footer „you navigate via „Page Number“ and „ Page End“ to yourfavourite formatting. You can choose whether the page number should be positioned at the bottom (or top) on the left, in the middle or on the right.
If you insert the page number in this way, it will automatically start on the first page and each page will have a page number.
To edit the page number format further, you can switch to the „Start“ tab(while editing the header or footer is active) and edit the page numberas you wouldany other body of text. To do this, you only need to select the number on one page and then choose the type, font size and font colour. This setting is then also applied to the other pages. When you are satisfied with the page number, you can finish editing the footer either by clicking on „Close header and footer“ or by double-clicking in the document.
Start with the page number only on page 3
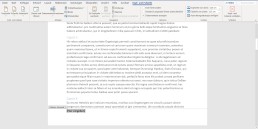
If you want to format your term paper correctly in your studies, you need to format the page number so that it doesn’t start until page 3. The cover page and the outline are not formatted. You can either do this with a crutch of two different documents (but then you cannot automatically create the table of contents), or you can divide the document into two sections. To divide the document into two (or more) sections, move the cursor to page 2, switch to the „Layout“ tab and add a new „Section break“ under „Breaks„. Now the document is divided into two sections. The second section now starts after the page on which the cursor was located (in this example on page 3). If you activate the paragraph marks and formatting symbols, you can see the section break here.

Thengo to page 3 and change to the header and footer menu, by double-clicking on the header or footer. In the „Header and Footer“ menu, in the middle of the upper menu band, you will find the Navigation field with the button „Link to previous page“Deactivate this button so that the page numbers are only inserted from page 3 onwards. Now you can insert the page number as usual. By default, page number 3 appears here, but to number page 3 of the document as page 1, navigate via „Page number“ in the „Insert“ tab to „Format page number Here you enter the value 1 for „Start at“.
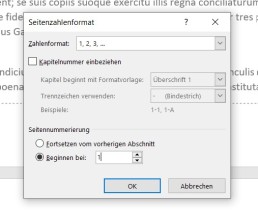
Now page number 1 appears on page 3 of the document.
Header image: © adam121, stock.adobe.com

Microsoft Word: Creating a table of contents in Word
Microsoft Word: Create a table of contents in Word
How to create a table of contents with Word
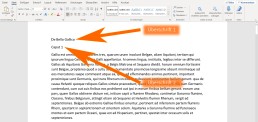
To create a table of contents with Word, you must first format all headings accordingly. In the „Start“ tab, there are various format templates that can designate a paragraph as a heading or subheading.
A paragraph is created in Word by pressing the ENTER key and ismarked with the formatting character „¶“. A line break does not automatically mark the end of the paragraph.
Format headings
Word can create up to 9 heading levels. The different levels are also displayed accordingly in the table of contents. A chapter heading should always be formatted as „Heading 1“, followed by a „Heading 2“ and so on. The next chapter heading is then again a „Heading 1.“
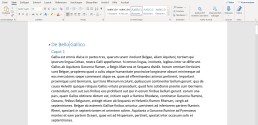
To create a heading, simply type it in, move the cursor to the heading and click on thedesired heading level in the „Style sheets„. The entire paragraph in which the cursor is located is always formatted as a heading.
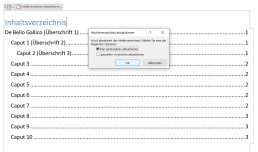
This is how correctly formatted headings look in the document:
Insert table of contents
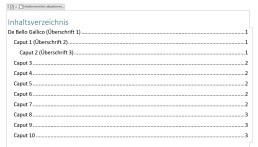
After you have formatted the headings correctly, you can insert the table of contents with a few clicks. To do this, move the cursor with the mouse to the place where the table of contents is to be inserted – this is usually on the second page of the document. Then switch to the „References“ tab and click on „Table of contents “ A drop-down menu opens from which you can choose a format. By clicking on the table of contents, Word automatically inserts the table of contents.
Update table of contents
Word automatically displays the page number onwhich a heading or subheading appears when the table of contents‘ is created. If you make changes to the text after the table of contents has been created, the position of a heading may change. In order for the table of contents to show the correct page number, the table of contents must be updated.
To update the table of contents, switch back to the „References“ tab and click the „Update table of contents.“ button here If you only want to update other page numbers, click on „Update page numbers only.“ in the context menu If you have also inserted new headings or changed headings, click on „Update entire table of contents.“[/vc_column_text]
The table of contents does not need page numbers
In order for the table of contents to display correctly, you do not need to insert page numbers in Word.Even if no page numbers are displayed on the individual pages, Word displays the page number in the table of contents. If you want to have page numbers displayed in your document, we have already created the corresponding instructions. Here you will also find instructions on how to insert the page number only from page 3 onwards.
Header image: © pit24, stock.adobe.com

Microsoft Teams: Disable or enable autostart
Microsoft Teams: Disable or enable autostart
Autostart of Microsoft Teams deactivate
To deactivate the autostart of Microsoft Teams, simply follow the instructions below:
-
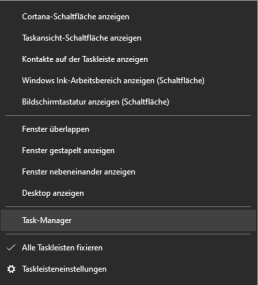
- Open Task Manager
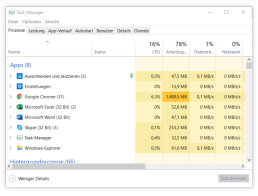
a. Simultaneously press the „Windows key“ and „X“ or click with a Right-click on the start bar. b. In the menu that opens, right-click on the Task Manager the Task Manager. (Alternatively, you can also open the Task Manager with „Ctrl“ + „Alt“ + „Del“ )
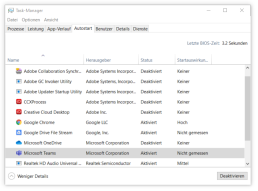
2. the autostart tab a. The task manager is organised by different tabs (tabs). Here you need to select the„Autostart“tab.
3. disable Microsoft Teams a. In the autostart list you must now search for theprogramme „Microsoft Teams“ (Under certain circumstances, however, a large number of programmes may be listed here. If you cannot find Microsoft Teams, you can simply type in the first letter „M“. The automatic search jumps directly to the place where the programmes begin with „M“) b. If Microsoft Teams is selected, you can deactivate it by clicking on the„Deactivate“ button at the bottom right.
Activating Microsoft Teams Autostart
Activating Microsoft Teams works in the same way as deactivating it. If you jumped straight to this part of the text, here are the step-by-step instructions again:
- Call up Task Manager
a. Simultaneously press the „Windows key“ and „X or click with a Right-click on the start bar. b. In the menu that opens, right-click on the Task Manager the Task Manager. (Alternatively, you can also open the Task Manager with „Ctrl“ + „Alt“ + „Del“ ) 2. The Autostart tab a. The task manager is organised by different tabs. Here you must select the tab „Autostart select. 3. Deactivate Microsoft Teams a. In the autostart list you must now search for the programme „Microsoft Teams“ (Under certain circumstances, however, a large number of programmes may be listed here. If you cannot find Microsoft Teams, you can simply type in the initial letter Type in the first letter „M“. The automatic search jumps directly to the place where the programmes begin with „M“) b. If Microsoft Teams is selected, you can deactivate it by clicking on the button „Deactivate in the bottom right-hand corner.