Microsoft Word: Create a table of contents in Word
How to create a table of contents with Word
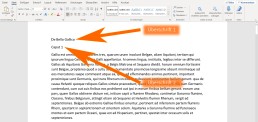
To create a table of contents with Word, you must first format all headings accordingly. In the „Start“ tab, there are various format templates that can designate a paragraph as a heading or subheading.
A paragraph is created in Word by pressing the ENTER key and ismarked with the formatting character „¶“. A line break does not automatically mark the end of the paragraph.
Format headings
Word can create up to 9 heading levels. The different levels are also displayed accordingly in the table of contents. A chapter heading should always be formatted as „Heading 1“, followed by a „Heading 2“ and so on. The next chapter heading is then again a „Heading 1.“
To create a heading, simply type it in, move the cursor to the heading and click on thedesired heading level in the „Style sheets„. The entire paragraph in which the cursor is located is always formatted as a heading.
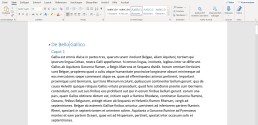
This is how correctly formatted headings look in the document:
Insert table of contents
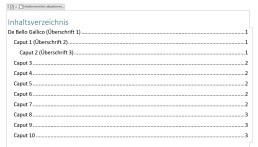
After you have formatted the headings correctly, you can insert the table of contents with a few clicks. To do this, move the cursor with the mouse to the place where the table of contents is to be inserted – this is usually on the second page of the document. Then switch to the „References“ tab and click on „Table of contents “ A drop-down menu opens from which you can choose a format. By clicking on the table of contents, Word automatically inserts the table of contents.
Update table of contents
Word automatically displays the page number onwhich a heading or subheading appears when the table of contents‘ is created. If you make changes to the text after the table of contents has been created, the position of a heading may change. In order for the table of contents to show the correct page number, the table of contents must be updated.
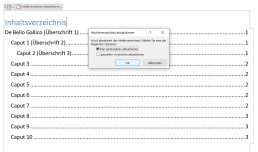
To update the table of contents, switch back to the „References“ tab and click the „Update table of contents.“ button here If you only want to update other page numbers, click on „Update page numbers only.“ in the context menu If you have also inserted new headings or changed headings, click on „Update entire table of contents.“[/vc_column_text]
The table of contents does not need page numbers
In order for the table of contents to display correctly, you do not need to insert page numbers in Word.Even if no page numbers are displayed on the individual pages, Word displays the page number in the table of contents. If you want to have page numbers displayed in your document, we have already created the corresponding instructions. Here you will also find instructions on how to insert the page number only from page 3 onwards.
Header image: © pit24, stock.adobe.com